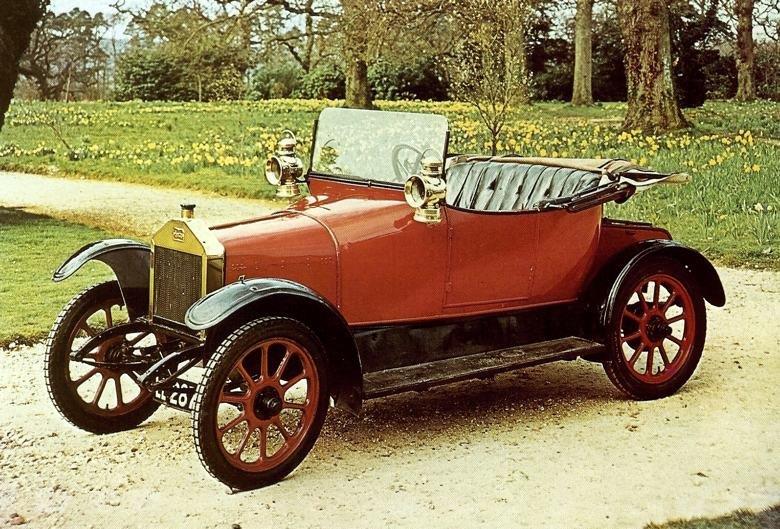
I have always admired and wanted to own a small Edwardian car. I didn’t have any particular make or model in mind, just a small pre-First World War car. But the prospect of finding or affording anything suitable seemed remote until a chance telephone call in May 2011. My friend Rod called to ask how much I thought a 1914 Singer was worth. The owner and a potential buyer couldn’t agree on a price. My reply was that the seller had the right price and that I wanted the car. I already knew the car as I had seen it at a few events. I immediately telephoned the owner who was rather surprised to receive my call as the Singer wasn’t advertised anywhere, the potential sale being between two friends. I was told to call back in seven days to see if the car was still available. Exactly seven days later I called again and was pleased to be told that the Singer could be mine, although the price had crept up by £500. I went over that afternoon and after a test drive I agreed to buy it.

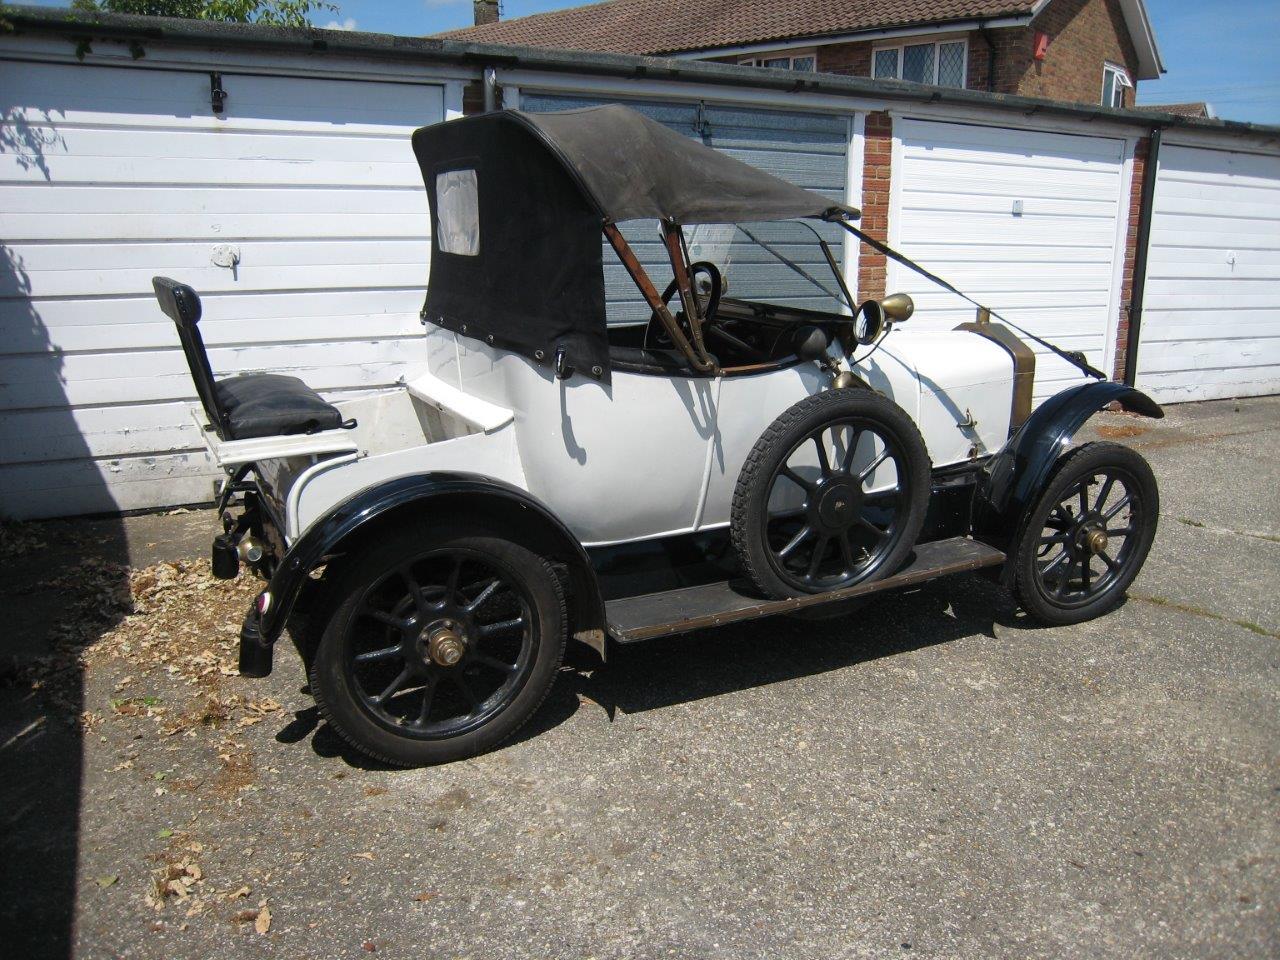


The car appeared to be in good mechanical condition but the body and chassis were both rather scruffy. This suited me fine as I planned to give it a light restoration. Far easier to start with a car that is complete and running rather than a rusty wreck. The body was painted white, which certainly didn’t suit it, but seemed fairly sound. The black leather seat was in good order, but the hood was very old and in poor condition. Underneath the car there was a fair amount of surface rust and some small holes in the front wings, and the chassis was caked in years of thick old oil and muck.
I collected the Singer a week later and drove it the 16 miles home. I was extremely pleased with the way it performed and was at last happy to have acquired the car of my dreams.
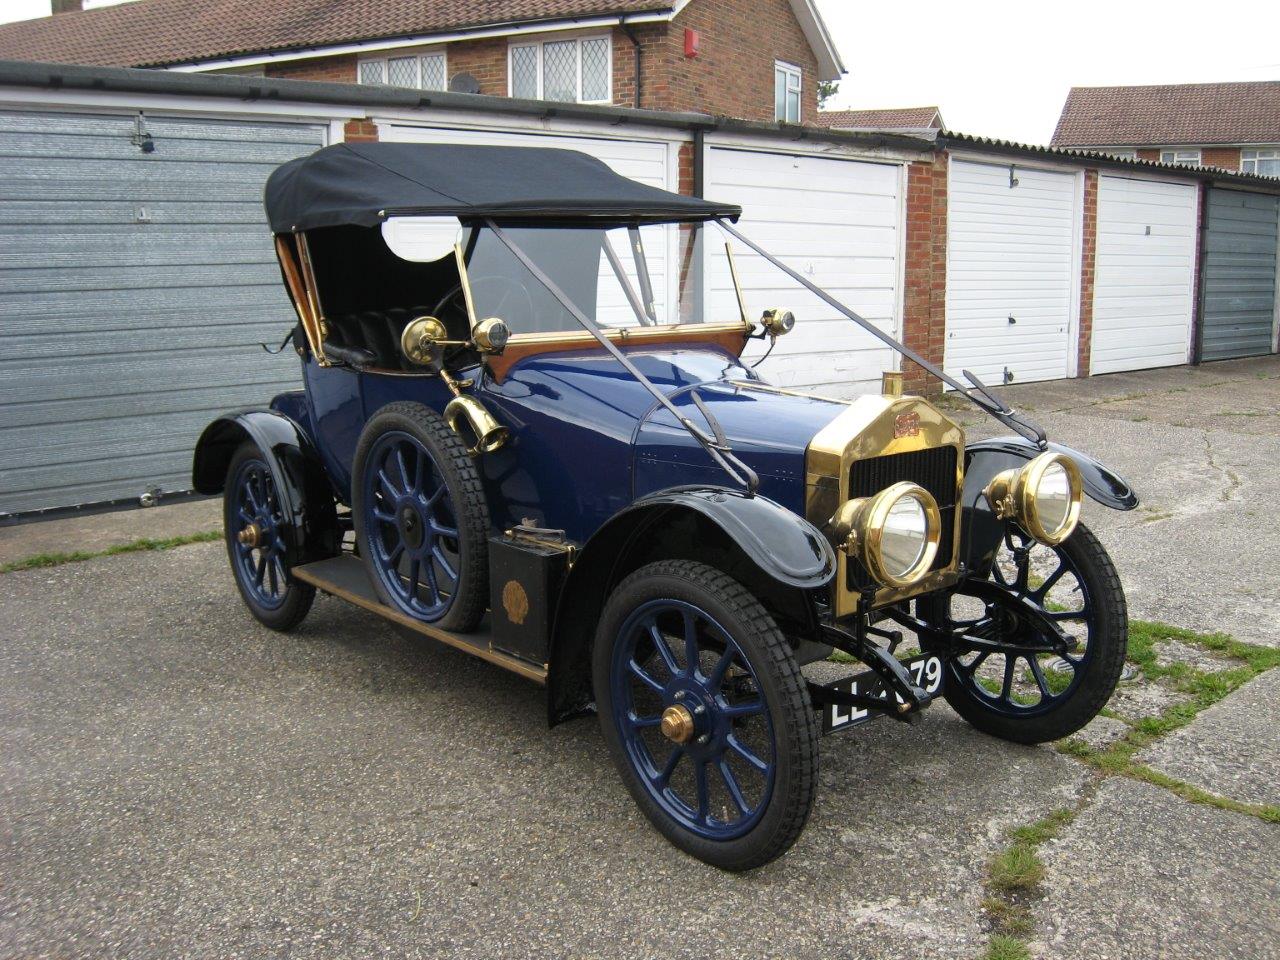
The Singer came with a large history file and I spent an enjoyable few hours sorting through the paperwork and tracing the car’s history. The Singer was built in early 1914 and was first registered in London as LL2879. A dealer’s plaque on the dashboard shows that it was supplied by Wm. Osborne & Co., Automobile Agents and Body Specialists, 60 Piccadilly, London W. Tel Regent 3886 & 3887. Unfortunately the car’s early history is unknown and as the old London registration records have been destroyed it’s now impossible to find out. As it was supplied new just a month or two before the First World War was declared I can only wonder as to what happened to the car during the first four years of its life. Nothing is known until the mid-1930’s when the Singer was given to Mr Olorenshaw of the Norwich Motor Company, who at that time were Singer agents. The car was displayed in their showroom in Norwich until the late 1940’s when the Norwich Motor Company gave up their Singer agency. Mr Olorenshaw had always been friendly with the Directors of the Singer Motor Company so he sent the car to Coventry on free loan to Singer and they kept it on exhibition for many years. In 1960 the Singer was moved to the newly opened Montague Motor Museum in Brighton where it remained throughout the 1960’s. At this time was painted maroon. When the Brighton Motor Museum closed in the late 1960’s the car was returned to Mr Olorenshaw who the stored it until 1976. After 40 years of ownership the Singer was sold to a new owner in Manchester. This person only kept it for a couple of years as in 1978 it changed hands and moved Ireland where it was owned by Rev Patrick Faran for the next 11 years. In 1989 the Singer sold for £10,000 and moved to Northamptonshire where it stayed with Mrs Jean Bannell until 2002. However, she did try and sell the car through Smallbone’s of Birmingham but despite advertising it in The Automobile magazine every month from September 1996 until August 1999 they were unable to find a buyer. Mrs Bannell finally sold the Singer in 2002 to a new owner in Essex. A year later it was on the move again and came south to Fordingbridge, Hampshire. It remained with that owner until 2009 when it moved to Sussex and I purchased it from there in May2011.
During the summer of 2011 the Singer was used for three events before I was ready to start the restoration in late September. I took a week off work and started to dismantle the car so that I could repaint it blue, my chosen colour. When I started I wasn’t actually sure how far I would be stripping the car or what other work I would be doing other than painting the body. I started on the Tuesday afternoon and working through Wednesday I quickly removed the wings, bonnet, door, hood, windscreen, running boards, radiator, boot lid, petrol tank and floor boards. I then realised that there were only 5 bolts holding the body to the chassis so it would be simple to lift the body. There should have been 6 bolts but one was missing! On Thursday a friend came over to hep lift the body. He bought with him some lengths of timber and 4 large casters which we quickly turned into a trolley to take the Singer’s body. The next day my brother Tim came to help lift the engine out. By the Saturday afternoon all that was left were a pair of bare chassis rails. Just four days earlier it had been a complete drivable car!

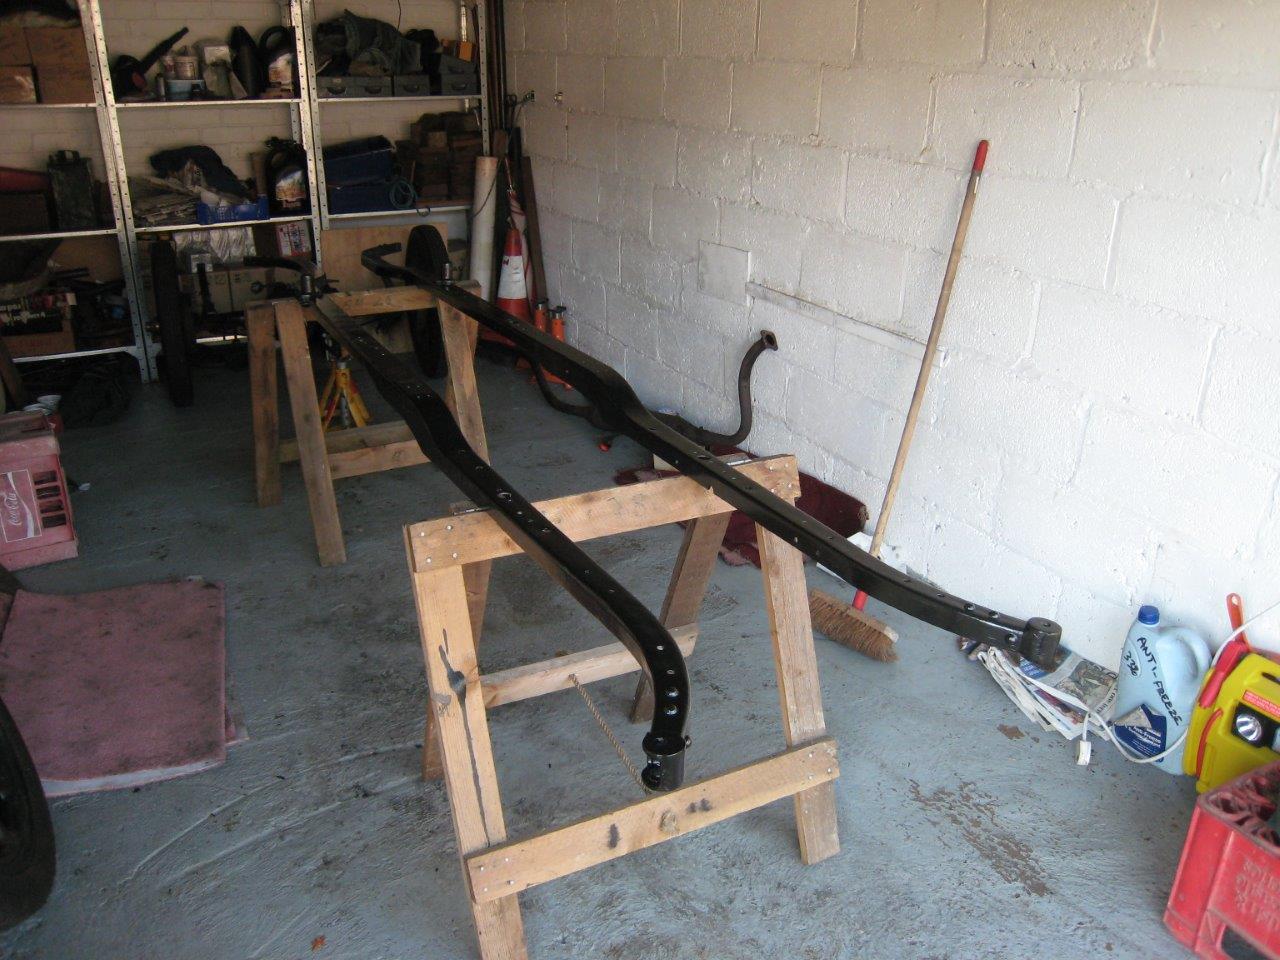


The chassis rails were cleaned back to bare metal before receiving two coats each of etch primer, black undercoat and black coach enamel. I used Craftmaster coach enamels for all the chassis and body painting. A large pile of chassis components were taken for sandblasting, and this revealed that 4 out of the 5 running board brackets were broken and needed welding. After repairing these all the chassis components were painted as per the chassis rails.
The front springs were a problem as they weren’t a matched pair. The offside spring was much stronger than the nearside one which made the front of the car lop-sided. I found that the top leaf was the correct original made from 3/16” thick spring steel but all the lower leaves were ¼” thick. I took both springs to Brost Forge in London who remade the incorrect spring and re-set both springs slightly flatter as the car had been sitting too high at the front.
Everything else on the chassis appeared to be in good order with minimal wear. It was therefore a straight-forward job of cleaning and painting. The gearbox (3 forward speeds and reverse) is inside the rear axle and this seemed to behave well when I had driven the car so I just changed the oil. Unfortunately a year later a gear broke so I had to totally rebuild it. The brakes (on the rear wheels only) have separate shoes for the foot and hand brakes. A large diameter pair for the foot brake and a smaller diameter pair inside these for the handbrake. The brake shoes are cast iron operating inside cast steel drums. No brake linings are fitted. These work extremely well but can squeal a bit in use. New brake pull-off springs were needed and new sealed wheel bearings were fitted.
The four-cylinder petrol engine of 108cc has two blocks of two cylinders on a common crankcase. There are no detachable cylinder heads, just brass screwed caps to access the valves. The engine had been running well so I was hoping I wouldn’t find any problems. I removed the cast aluminium oil sump and found an inch of thick black sludge in the bottom which was easily cleaned out. The engine doesn’t have an oil dip stick but instead has a brass tap that you open to see if there is enough oil. To check you open the tap and if oil comes out there is too much in the engine and if nothing comes out there isn’t enough. But you have no idea how low the level is so you have to pour fresh oil into the engine until it comes running out of the tap. A most inconvenient arrangement. So instead I drilled and taped a hole in the sump to take a glass oil sight tune. Now a quick glance shows exactly how much is in there. With the engine on my shed floor I removed the top water manifold and was surprised to see the rear cylinder block was still full of water. It should all have drained out when I emptied the radiator. The waterways in the rear block were half full of the original moulding sand from when it had been cast in 1914. There could never have been water circulating through that block since the day it was made. With difficulty I managed to remove all the rock-hard sand using various tools so that water now flows nicely.
By Christmas 2011 after three months of working every spare minute I had refurbished and painted every part of the chassis so I was ready to start re-assembling it. On Thursday 29th December I had all the parts laid out on the garage floor and started putting them back together. By Saturday 31st December I had a rolling chassis and that afternoon a friend helped lift the engine back in. On New Year’s Day 2012 I completed the chassis by fitting the radiator and headlamps. It had taken less than four days to go from a pile of parts to a complete running chassis.
I had been hoping to get the car finished and back on the road by May 2012 but snow and poor weather stopped work for two months. At the beginning of March I took a week off work to start restoring the body. I stripped all the old paint off using a hot air gun, the paint coming off in layers. Under the white top coat was an undercoat followed by a thick layer of spray filler. Next were a black sealer coat and then the maroon top coat that was there in the 1960’s. There were more undercoats and finally a huge amount of filler in many areas. Finally under all these layers I uncovered a few very small patches of the original dark blue paint applied in 1914.
The plywood bulkhead was in poor condition as the glue had failed so it was delaminating. I could have made a new one but as it was the original 98 year old wood I opted to inject glue between the plies and then clamp it together with numerous G-clamps. The floor boards were a mixture of plywood and sawn timber. Again the plywood was suffering so I considered replacement. I assumed that originally the floor boards would all have been plywood or sawn timber rather than a mixture. But when I cleaned all the boards up I discovered that every piece was stamped with the body number. I managed to save all the boards and then glued new rubber matting on them.


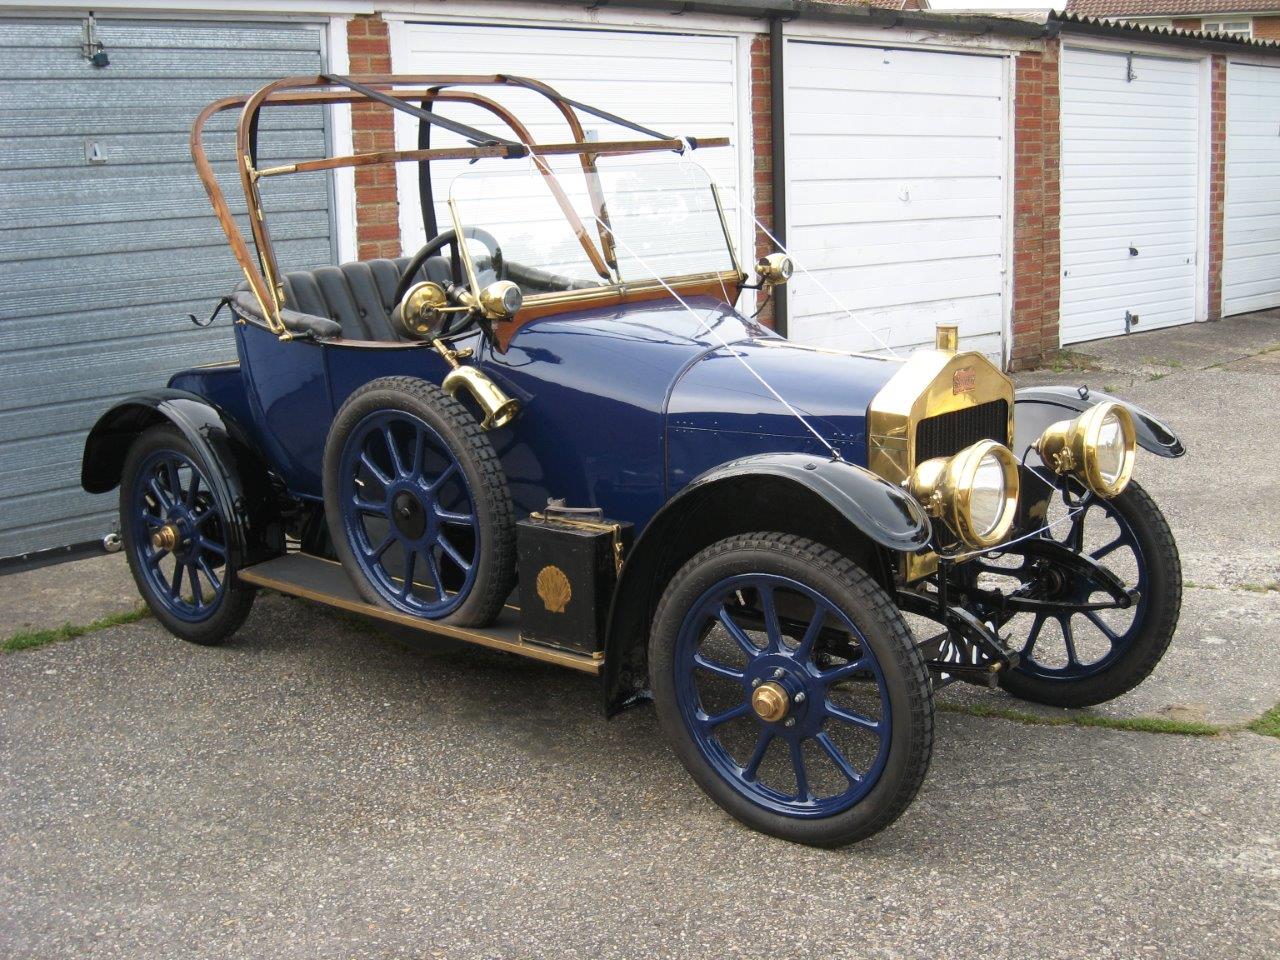

Returning to the body, there was no rust on any pf the panels but the panels were very rippled. The body has a wooden frame over which the steel panels are fixed with half-round aluminium beading. A few minor dents were easily sorted out but the rippled panels explained why I had found so much filler when stripping the paint off. I spent several days applying filler and rubbing it down to leave a smooth finish. The body then received a coat of etch primer before I brushed on three coats of dark blue undercoat, After flatting this off I applied the first coat of Atlantic Blue coach enamel. This was flatted off before a second coat was applied. All painting was carried out in the traditional way by brush. The inside and underneath of the body were finished in satin black and the half-round beading in gloss black. The paint was left for a couple of weeks to harden and then a couple of friends helped to lift the body back on the chassis.. By now it was mid-June so my deadline of May had long passed!
The petrol tank is fitted behind the dashboard with the filler spout protruding through the dash. I refurbished the tank and bolted it in place. Then the dashboard and other internal wood were rubbed down before re-varnishing. After re-wiring the dashboard was fixed back in the car. The door, boot lid and bonnet were tackled next. These were stripped of the old paint before being lightly filled and finished in Atlantic Blue coach enamel. At last the end of the restoration was in sight as there was just the wings and hood to do. I had all four wings sandblasted and was pleased to see that no more rust holes had appeared. The rear wings were sound but rather dented but the front wings both needed a small amount of welding along the lower edge. Once repaired the wings were painted in gloss black.
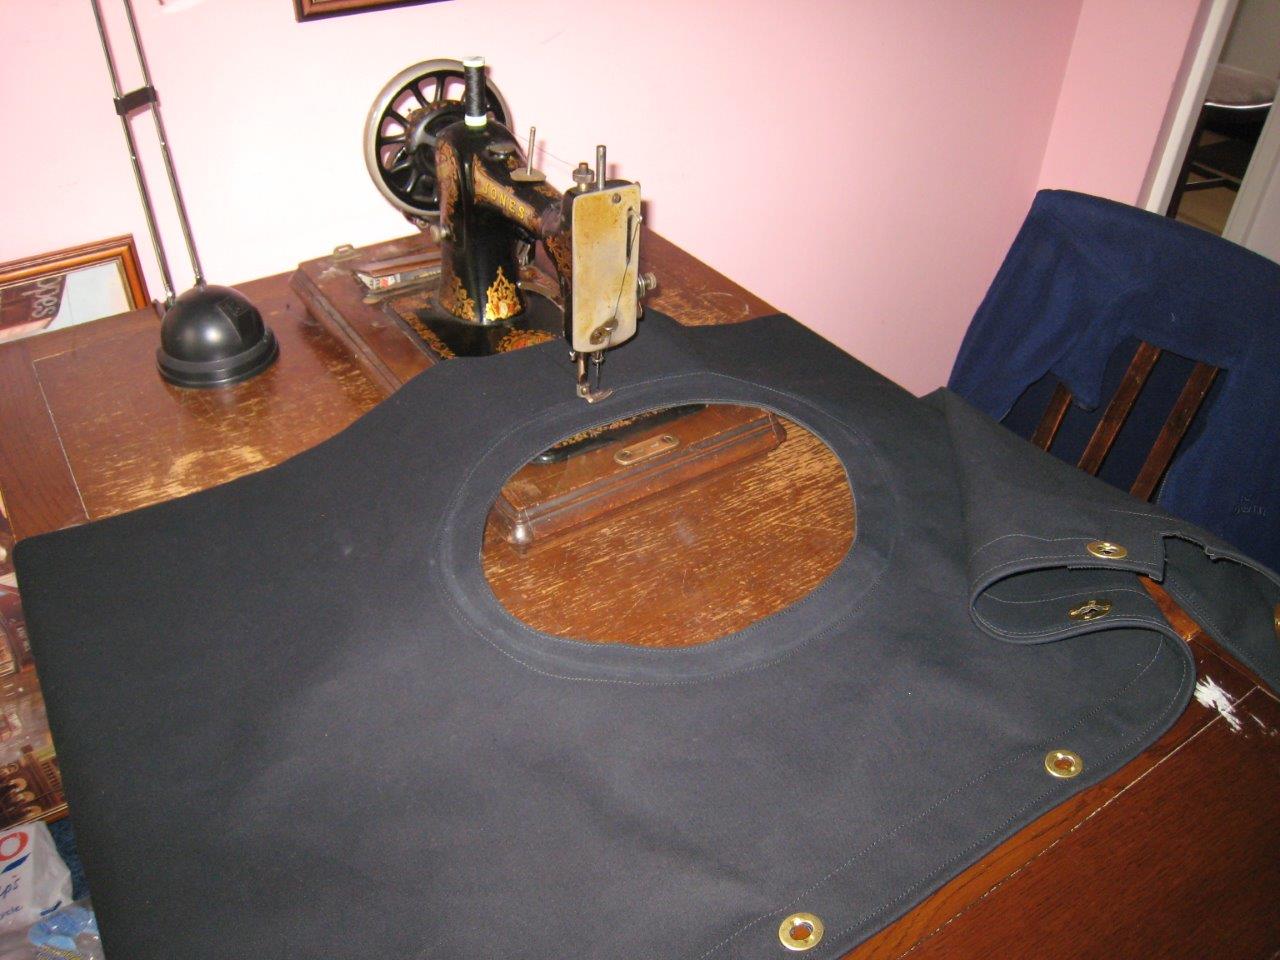
The final part to be restored was the hood and frame. The old canvas hood material was very faded and rather fragile in places. I carefully removed hundreds of tacks to remove the material from the wooden frame. Unfortunately while working on the hood one of the cast brass hood brackets broke. On close inspection it had been broken in the past but poorly repaired. The broken parts were brazed back together and then all the brass parts were polished to a nice shine. The wooden hood loops were cleaned up and re-varnished. I purchased two metres of new hood material and spent about 8 hours making the new hood on my ancient hand-turned sewing machine. With the restored hood frame back on the car I spent another three hours fitting the hood to the frame. In use the hood doesn’t clamp to the windscreen but hovers a few inches above it. The hood is then held in place and tensioned by two long leather straps running down to the front wings. New leather straps were sourced from a saddle maker.
The restoration of the Singer was completed at the end of July 2012 and the car was taken for an MOT a few days later. The end result looks superb and the blue paintwork looks so much better than the white.
David Ralph